
As you might have already noticed, the internal’s opencv camera interface is far from complete. You can capture video from your camera without a hassle but you’re very limited to what you can do.
For instance, let’s say you have a webcam that can run at HD resolution ( 1280 x 720 px ), you can use the opencv’s class cv::VideoCapture to get the frames but you’re going to have a hard time on getting the full resolution out of your device.
To sort out this problem, one could use specialized libraries. The disadvantage : they’re not usually multi platform so you’ll find yourself writing classes for every platform where you’re camera device operates.
Theo developed a very useful video capture library for windows called videoInput.
You can find the sources here, and the old site here.
This library is already used internally in opencv and can be found somewhere in the source code. However, I find it easier to copy all necessary files into a 3rd party folder and configure the project using those files and cmake.
In this post I will show you how to easily interface the videoInput library with OpenCV. The project is functional but incomplete. Feel free to modify it and to use it as inspiration for your own projects.
I Files organization
The root folder is organized in two subfolders :
-
3rdParty :
-
VideoInput/DShow : includes all libs used by VideoInput library itself.
-
VideoInput/include : contains the header that will be used in our project.
-
VideoInput/videoInputLib.a : the precompiled VideoInput lib to be linked to our project.
-
-
src :
-
CameraWindows.cpp : the camera class that uses VideoInput as its backend.
-
CameraWindows.h : the class header.
-
main.cpp
-
CMakeLists.txt : the configuration file for our project.
-
II Software architecture
The CameraWindows class manages all the camera functions and settings. The constructor initializes all camera properties, there is a method to fetch new frames from the camera, a method to get the previously captured frame and the destructor which disconnects the device and frees up all resources.
class CameraWindows
{
public:
	CameraWindows( const int deviceNb = 0, const int width = 1024, const int height = 720);
	bool fetchNewFrame();
	cv::Mat &getFrame();
	virtual ~CameraWindows();

protected:
	videoInput mVideoInput;
        ...
	unsigned char * mBuffer;

	cv::Mat mFrame;
        ...
};
The constructor implementation uses videoInput :
CameraWindows::CameraWindows( const int deviceNb, const int width, const int height ) :
	mDeviceNb ( deviceNb )
{
	...
	// Setup device with video size and connection type
	mVideoInput.setupDevice(mDeviceNb, width, height, VI_COMPOSITE);

	// As requested width and height can not always be accomodated
	// make sure to check the size once the device is setup
	mWidth = mVideoInput.getWidth(mDeviceNb);
	mHeight = mVideoInput.getHeight(mDeviceNb);
	mSize = mVideoInput.getSize(mDeviceNb);

	// Create the buffer where the video will be captured
	mBuffer = new unsigned char[mSize];

	// Disable autofocus and set focus to 0
	mVideoInput.setVideoSettingCamera(mDeviceNb, CameraControl_Focus, mDefaultFocus, CameraControl_Flags_Manual);

	...
}
The key point here is the use of _getPixels _method that will write what the camera sees into the buffer. Then if everything goes smooth, we proceed to create an image using the buffer and finally we pass that image on to the frame.
bool CameraWindows::fetchNewFrame()
{
	//fills pixels in buffer as a BGR (for openCV) unsigned char array - flipping
	bool success = mVideoInput.getPixels(mDeviceNb, mBuffer, false, true);

	if( success )
	{
		cv::Mat image( mHeight, mWidth, CV_8UC3, mBuffer );
		mFrame = image;
		return true;
	}
	else
	{
		std::cout << "Error loading frame from camera (Windows)." << std::endl;
  		return false;
  	}
}
The program displays the camera contents in a window until a key is pressed.
int main( int argc, char** argv )
{
	CameraWindows camera;

	cv::namedWindow("camera");

	for( ;; )
    {
        if ( camera.fetchNewFrame() )
        {
        	cv::imshow("camera", camera.getFrame() );
        }

        if( cv::waitKey(30) >= 0 )
		{
        	break;
		}
    }

	return 0;
}
And the CMakeLists.txt file. It might be a bit hard to understand if you’re not used to cmake.
# Project properties
SET( projectName cameraWindows )
PROJECT( ${projectName}_PRJ )
CMAKE_MINIMUM_REQUIRED(VERSION 2.8)

# OPENCV
FIND_PACKAGE( OpenCV REQUIRED )

# VIDEOINPUT
FIND_PATH( VIDEO_INPUT_INCLUDE videoInput.h ${CMAKE_CURRENT_SOURCE_DIR}/../3rdparty/VideoInput/include )
FIND_PATH( VIDEO_INPUT_LIB_DIR videoInputLib.a ${CMAKE_CURRENT_SOURCE_DIR}/../3rdparty/VideoInput )

link_directories( ${VIDEO_INPUT_LIB_DIR}/DShow )

INCLUDE_DIRECTORIES( ${VIDEO_INPUT_INCLUDE} )
INCLUDE_DIRECTORIES( ${VIDEO_INPUT_LIB_DIR} )

SET( VINPUT_LIB ${VIDEO_INPUT_LIB_DIR}/videoInputLib.a )
SET( VINPUT_LIB2 ddraw dxguid ole32 oleaut32 strmbasd strmbase strmiids uuid )

# EXECUTABLE
ADD_EXECUTABLE( ${projectName} main.cpp CameraWindows.cpp)

TARGET_LINK_LIBRARIES( ${projectName} ${OpenCV_LIBS} ${VINPUT_LIB} ${VINPUT_LIB2} )
III Setting up the CMake project
As usual launch cmake and fill in the blanks. If you’re using eclipse don’t forget to indicate whether you’re using debug or release mode (CMAKE_BUILD_TYPE) and to link it with the correct opencv ( OpenCV_DIR ).
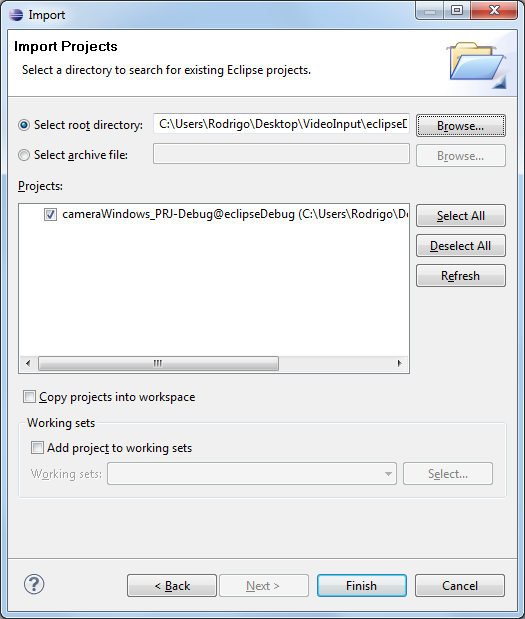
 Then you can open the project cmake created for you. Double click the solution file if you’re using visual studio, or import the project to your workspace if using ecplise.
IV Final Words & Links
VideoInput is very useful but I find it is poorly documented. Fortunately it is open source. You can see for example that the method setVideoSettingCamera(…) in VideoInput.h does not describe the properties nor the values you can use to set up the camera. By looking at the code, you will discover the function uses IAMCameraControl internally which is well documented here. That is how I discovered how to disable the autofocus of the camera (used in this example).
PS : if you didn’t notice you can easily modify the code of main.cpp to use multiple cameras and multiple resolutions ;)
The project source files can be found here.
Voilà. I hope this post will help you getting started using advanced features of your camera. Comments, remarks and questions are highly appreciated.